Feeds:
Posts
Comments

Archive for the ‘Quilting’ Category

 Finally, I got to do the next step in my Block Letters For Baby quilt! (Based on the Billboard Quilt-Along at Oh Fransson!)

First of all, I cut the freezer paper templates of each letter into pieces and grouped them by colour so that I had five wee piles. (I only did one letter at a time, so that the pieces didn’t get mixed up!)
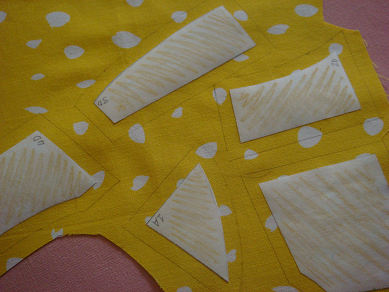
Iron freezer paper pieces to front of fabric

I allocated the colour of each pile to a certain fabric. The fabrics I chose were random ones garnered from my meagre “stash” (and my Mum’s!) Then I got a pile of coloured paper pieces, e.g. purple, and ironed them to the front of one of the fabrics.

I had to keep reminding myself to iron the paper to the FRONT of the fabric, it just felt so weird. More than once I had to peel them off and turn the fabric over and iron them again. Lucky freezer paper lets you do that several times before it stops sticking.

I also had to redo some of them because I didn’t leave a big enough seam allowance. I hate waste, so I’m always really stingy when measuring and cutting fabric.

I didn’t have a rotary cutter and a board, so I used a ruler and a pencil to mark the seam allowance around each piece then cut them out with fabric scissors. It seems to have worked fine 🙂
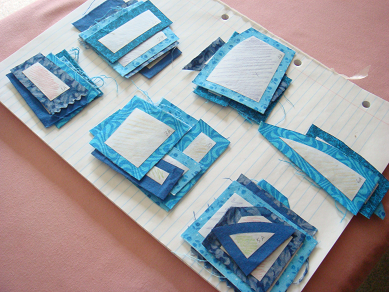
Pieces grouped by number, e.g. 1a-1e, 2a-2e, etc.

I then put the fabric/freezer paper pieces into piles again, this time by number rather than colour. The little codes I put on at the start really helped here. That Elizabeth really is a smartie.

Lay out the pieces to form the letter

I used the codes to help me put the letters together like a puzzle. It was really cool seeing them take shape.

After checking that they all matched together I put them back into their column stacks next to the sewing machine. That made it nice and easy to get them in the right order.

The really tricky part was lining up the “wonky” seams – you can’t line up the edge of the two fabrics, inside you’ve got to try and pull the edge of the top one up so you can peek inside and line up the edges of the freezer paper.

I sawed together all the number ones, then the twos, threes, fours, etc, until all the columns were assembled. Then I pressed the seams open with ma trusty iron!

Lastly I just had to sew the columns together and voilà!

Now I just got some thread trimmin’ to do and then we’re read to appliqué!

Read Full Post »

Woohoo! Guess who’s started making her Block Letters For Baby quilt? That’s right, me!

Using Elizabeth Hartman’s Billboard Quilt-Along as a guide, I got out my coloured pencils and started planning the top of my quilt.

Because it’s a baby quilt I don’t want to have too many letters and I’d like them to be big and bold, not all squashed in. So I decided on six 12″x12″ squares, two wide and three long, for the quilt top (so many resources for quilting are still in inches, so it usually pays off in the end to write down all the measurements in inches – I always have pages of numbers and conversions, trying to work out what all the inches actually mean in cm).

The quilt needs to be unisex, since my friend won’t know the gender of her baby until she or he is born. I decided to use six different colours for the quilt top, with a plain background to help the letters stand out. I think white’s crisp and clean-looking, but ultimately impractical, and giving a new mum a white baby quilt’s a wee bit mean. So I’m going for beige, and using homespun to give it a homey, speckled, natural look.

I used a simple plan and played with my coloured pencils to work out the placement of the colours (the real beauty of it is that it probably doesn’t matter). The colours I’m using are green, yellow, orange, purple, blue and red.

The letters I chose are LOVED♥. Ok, so one of them isn’t a letter. <3!
I got the letters printed at a copy shop to fit within a 10″ square (I drew the heart myself at home).

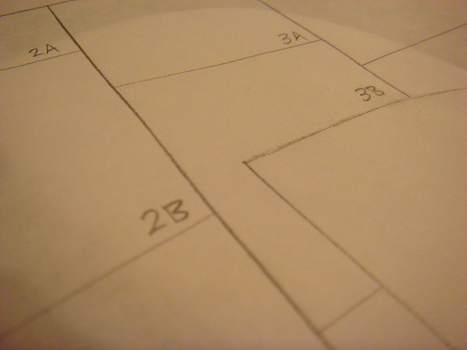
At home I traced them onto freezer paper and then divided each into wonky columns and segments as per the quilt-along’s instructions.

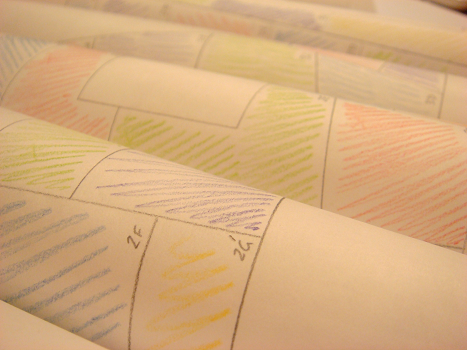
Finally, I got out my coloured pencils again and used them to plan out where each of the fabrics would go, to ensure that I won’t have any patches of the same fabric touching each other. I’ve decided to use five different fabrics for each letter/colour.

Colouring all the pieces with pencils was really fun!! Might have to break out the colouring books some time 😛

Now that I have the design of each letter planned out, the next step will be to cut out all the pieces that make up one of the letters, and use them to cut out the corresponding fabrics. Can’t wait! 😀

Read Full Post »

The other day I bumped into an old friend. I don’t know her really well, but she’s one of those beautiful people who just make you feel good, and make you feel really special when they call you a friend. Turns out she’s pregnant, and so of course immediately after I saw her my mind starting buzzing with ideas of what I could make for her to celebrate the birth.

That night I was browsing through some beautiful quilts online and came across Elizabeth Hartman’s new quiltalong at Oh Fransson. The Billboard Quilt is not only gorg-e-ous but it uses Elizabeth’s “Map of the States” technique that I’m so keen to try.

Elizabeth Hartman's 'Billboard Quilt' @ Oh, Fransson!

So I’m hoping to do a baby quilt for my friend with a small number of letters (probably 6), using mostly scraps from my own humble stash, and some “borrowed” from my mum’s.  Excited to get started on it, but determined that it won’t affect the other stuff I need to get done like study, work, etc.

Wish me luck!

Read Full Post »